How to Build Fantasy Brick Scenes: Sword Legends and Enchanted Stations
Fantasy building is where bricks stop being toys and start becoming stories. A castle rampart, a mist-wrapped platform, a sword frozen mid-pull from stone — these scenes reward builders who care about mood as much as mechanics. And you don't need a premium price tag to get there.
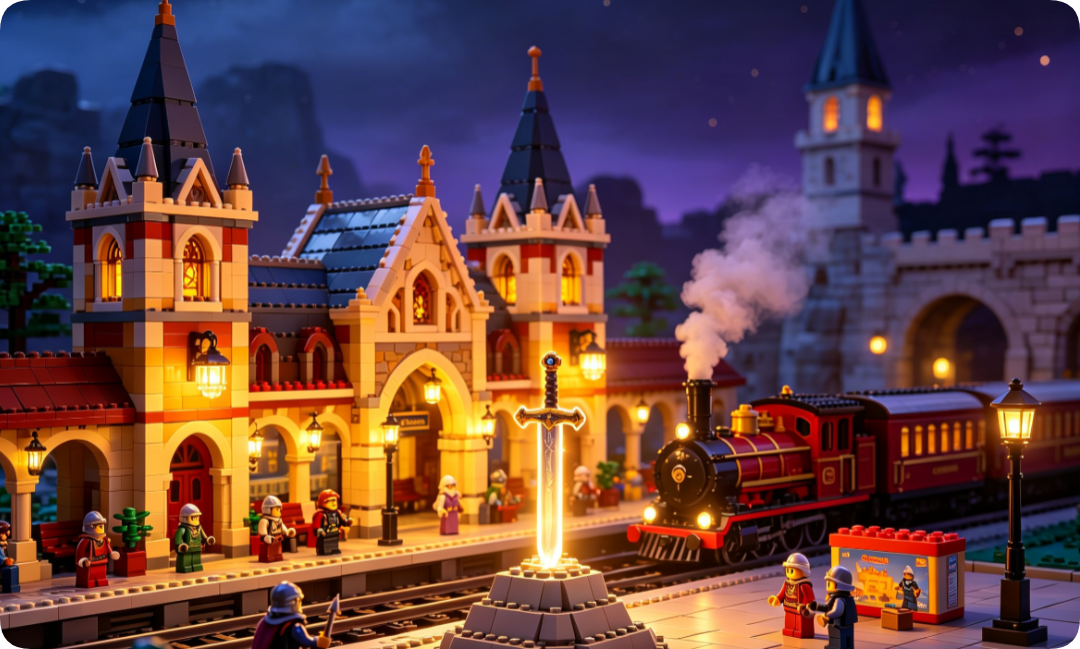
Fantasy building is where bricks stop being toys and start becoming stories. A castle rampart, a mist-wrapped platform, a sword frozen mid-pull from stone — these scenes reward builders who care about mood as much as mechanics. And you don't need a premium price tag to get there.
This guide shows you how to plan, build, and display fantasy-themed sets using a quality knock off lego brand alternative. Whether you're recreating a legendary blade like excalibur retrouvée or constructing a sprawling fantasy train station, the techniques below help you turn loose bricks into a display piece worth showing off.
Here's what you'll learn:
- How to plan a fantasy scene before you place a single brick
- Building techniques for texture, height, and atmosphere
- Customization tricks that make a build uniquely yours
- Display and lighting methods that bring the whole thing to life
Why Fantasy Themes Work So Well in Brick Form
Fantasy scenes give you creative freedom that realistic models can't. There's no "wrong" color for a dragon's cave or a wizard's tower. That freedom is exactly why so many adult builders gravitate toward the genre — it's relaxing, expressive, and endlessly customizable.
The appeal for adult builders
Fantasy builds hit three sweet spots at once. They challenge your problem-solving with irregular shapes and organic textures. They reward patience with a finished piece that looks stunning on a shelf. And they invite storytelling — every crumbling wall or half-buried sword implies a history.
That storytelling angle matters more than people think. A plain gray tower is a model. A tower with ivy creeping up one side, a broken window, and a lantern glowing at the top is a scene. The difference is intention.
Common mistakes beginners make
Before we build, avoid these traps:
- Flat surfaces everywhere. Fantasy thrives on texture. Smooth walls read as sterile.
- One shade of gray. Real stone mixes light gray, dark gray, tan, and even hints of green.
- Ignoring the base. A great build on a bare plate loses half its impact.
- Symmetry overload. Nature and ruins are irregular. Perfect symmetry feels artificial.
Step 1: Plan Your Scene Before You Build
Great fantasy builds start on paper, not on the baseplate. A few minutes of planning saves hours of tearing apart and rebuilding.
Choose your story first
Ask one question: what happened here? A fantasy train station could be a bustling hub for wizard commuters or an abandoned platform reclaimed by moss and time. Each version demands different colors, parts, and lighting. Decide the mood before you sort a single brick.
For a legendary sword build like excalibur retrouvée, think about the moment you're capturing. Is the blade newly forged and gleaming? Buried in stone for centuries? Held aloft in triumph? The story dictates the pose, the base, and the surrounding detail.
Sketch a rough footprint
You don't need artistic skill. A simple box drawing works:
- Mark the total footprint (how much shelf space you have).
- Note the tallest point (towers, spires, arches).
- Circle your "hero" element — the one thing the eye should hit first.
- Sketch where light or negative space will go.
Gather reference images
Pull three or four images that match your vision — concept art, film stills, or other builders' work. You're not copying; you're collecting ideas for texture, color, and shape. Browse the CraftBlockWorld gallery to see how finished fantasy scenes are staged and lit in real homes. Seeing a build photographed from multiple angles reveals tricks you'd never spot on a box.
Step 2: Master Fantasy Texture Techniques
Texture separates amateur builds from showstoppers. These techniques work with any standard-system alternative brick and cost nothing but time.
The "greebling" method for stone and ruins
Greebling means adding small, irregular detail to break up flat surfaces. For a crumbling castle wall or an old fantasy train station platform, layer these tricks:
- Offset your bricks by half a stud using jumper plates. Instant irregularity.
- Leave gaps where a stone has "fallen out." A missing brick reads as age.
- Mix plate heights. A wall built from bricks of slightly different depths catches shadow beautifully.
- Use cheese slopes (small angled pieces) tucked into corners for eroded edges.
Building organic shapes
Nature has no straight lines. For rocks, cliffs, and tree trunks, use SNOT techniques — Studs Not On Top. By turning bricks sideways and outward, you create angled, rounded forms that look far more natural than stacked cubes.
Start small. Build a single boulder using six or seven sideways plates angled around a central brick. Once that clicks, scale up to full cliff faces.
Adding foliage and decay
A handful of green and brown elements transforms a scene:
- Small flower and leaf pieces wedged into wall gaps
- Brown round bricks as exposed tree roots
- Trans-clear or trans-green pieces for magical moss or glowing fungus
Step 3: Build a Hero Element That Commands Attention
Every strong fantasy scene needs one focal point. For sword builds, that's the blade itself.
Recreating a legendary sword like Excalibur
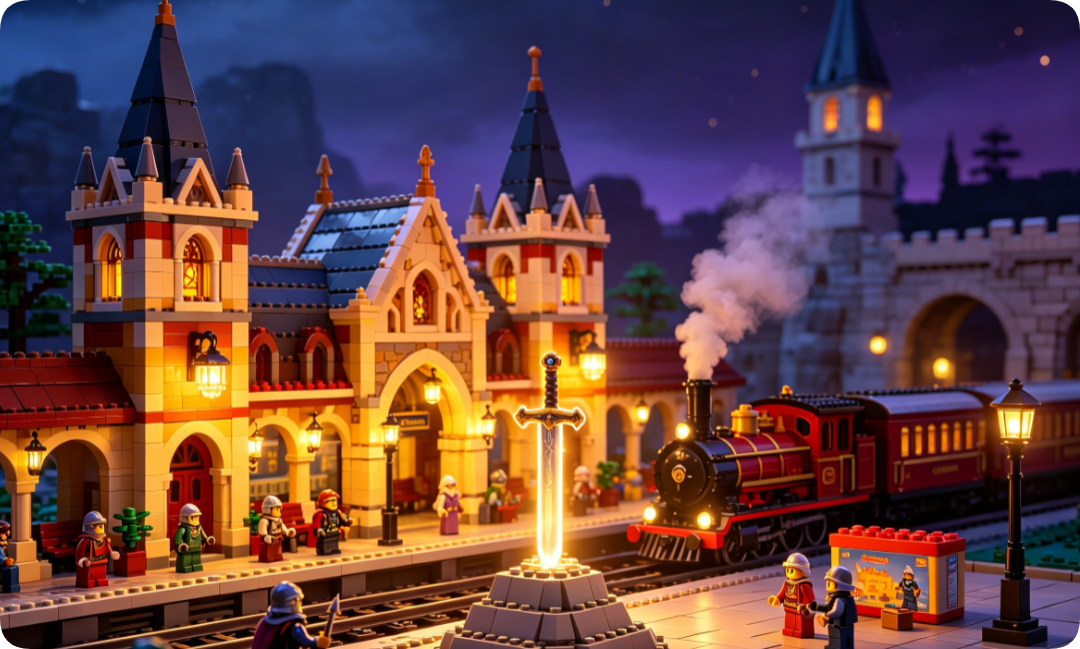
A build themed around excalibur retrouvée lives or dies on the sword's presentation. Here's how to make it pop:
- Elevate the blade. Mount it on a stone plinth or angle it emerging from a rock. Height draws the eye.
- Frame with negative space. Keep the area around the sword uncluttered so nothing competes with it.
- Add a glow. Trans-blue or trans-clear pieces at the base suggest enchantment.
- Weather the surroundings. A pristine sword against weathered stone creates dramatic contrast.
Making a station platform feel alive
For a fantasy train station, your hero element might be the clock tower, the arched entrance, or a magical train itself. Give it these touches:
- A working-look clock face using printed or layered round pieces
- Lanterns along the platform edge (perfect spots for lighting later)
- A ticket booth or bench that hints at daily life
- Directional signage in a fantasy script style
Step 4: Customize With Alternative Parts
This is where quality alternatives shine. Because they use the standard stud-and-tube system, you can mix parts freely and source pieces the mainstream brands never made.
Why alternatives unlock creativity
A good knock off lego brand often produces unique elements — ornate arches, specialty printed tiles, unusual colors — that expand your palette without breaking your budget. For custom fantasy work, that variety is gold. You can grab a bag of specialty pieces, experiment, and not stress about wasting an expensive set.
Explore the range of themed pieces and sets on the CraftBlockWorld products page to see which specialty parts fit your next fantasy scene. Stocking up on connectors, slopes, and trans-clear elements gives you a customization kit you'll reach for on every build.
Kitbashing: combine sets for something new
Kitbashing means taking parts from multiple sets and combining them into an original creation. It's the heart of custom building. A castle set plus a botanical set can become an enchanted overgrown ruin. A train set plus a fantasy pack becomes your own fantasy train station with no official equivalent.
Rules for clean kitbashing:
- Keep a color logic. Pick two or three dominant colors and stick to them.
- Match scale. Mixing wildly different scales breaks the illusion.
- Blend transitions. Where two sets meet, add shared texture so the seam disappears.
Color swaps and modifications
Small swaps make big statements. Replace default roof tiles with a deeper color. Swap standard windows for arched ones. Add a trans-purple gem where a plain stud used to be. Each change nudges the build further from generic and closer to yours.
Step 5: Display and Lighting
A finished build deserves proper presentation. Display is the step most builders rush — and the one that transforms a good model into a centerpiece.
Choosing the right base
Your base frames the whole scene. Options:
- Landscaped baseplate — sculpted terrain with height variation
- Floating display — mounted on a stand for a dramatic look
- Diorama box — enclosed with a backdrop for depth
Adding light
Lighting is the single biggest upgrade you can make. Small LED kits designed for building sets thread through your model and illuminate windows, lanterns, and magical elements. A fantasy train station with glowing platform lamps looks ten times more atmospheric than the same build unlit.
Placement tips:
- Backlight trans-clear pieces for a magical shimmer
- Warm light for cozy, inhabited scenes
- Cool blue light for eerie or enchanted moods
- Hide wires inside walls and under the base
Photographing your work
Once it's built and lit, photograph it. Share it. The building community thrives on shared work, and posting your scene invites feedback, ideas, and connection with fellow builders. Shoot in soft, indirect light, get down to eye level with the model, and capture a few close-ups of your best texture work.
Curious how a brand approaches quality and design before you commit to a build system? Read more about the philosophy and standards behind CraftBlockWorld — understanding a maker's approach helps you trust the parts you're building with.
Putting It All Together
Fantasy building rewards intention at every stage. Recap the process:
- Plan the story — decide what happened in your scene before you build.
- Build texture — greebling, SNOT, and decay bring surfaces to life.
- Create a hero element — one focal point that commands the eye.
- Customize freely — kitbash, swap colors, and use specialty parts.
- Display with light — the right base and lighting seal the illusion.
Your first action: sketch one fantasy scene idea and list the three textures you'll need to pull it off. Then start sorting bricks.
Frequently Asked Questions
Q: Do I need expensive official sets to build detailed fantasy scenes?
No. A quality knock off lego brand uses the same standard stud-and-tube system, so you get identical building techniques — greebling, SNOT, kitbashing — at a fraction of the cost. Many alternatives also offer specialty parts and colors the mainstream brands never released, which actually expands your creative options for fantasy work.
Q: I'm a beginner. Is a fantasy build too advanced for me?
Not at all. Start with a small, single focal build like a sword on a plinth or a single ruined tower. These use just a few dozen pieces and teach you texture and framing without overwhelming you. Build confidence on small scenes, then scale up to larger dioramas like a full station.
Q: How do I make my fantasy scene look aged and weathered?
Mix multiple shades of gray and tan rather than one flat color, leave deliberate gaps where "stones" have fallen out, and tuck small foliage or moss pieces into cracks. Offsetting bricks with jumper plates adds irregularity, and a few cheese slopes create eroded edges. Weathering is about controlled imperfection.
Q: Can I combine parts from different sets and brands?
Yes — this is called kitbashing, and it's the core of custom fantasy building. As long as parts use the standard system and you keep a consistent color logic and scale, you can blend a castle set, a botanical pack, and a train set into an original creation no official box could match.
Q: What's the easiest way to upgrade a finished fantasy build?
Add lighting. A small LED kit that illuminates lanterns, windows, or trans-clear magical elements delivers the biggest visual payoff for the least effort. Pair warm light with cozy scenes and cool blue light with enchanted or eerie moods, then hide the wires inside walls and under the base.